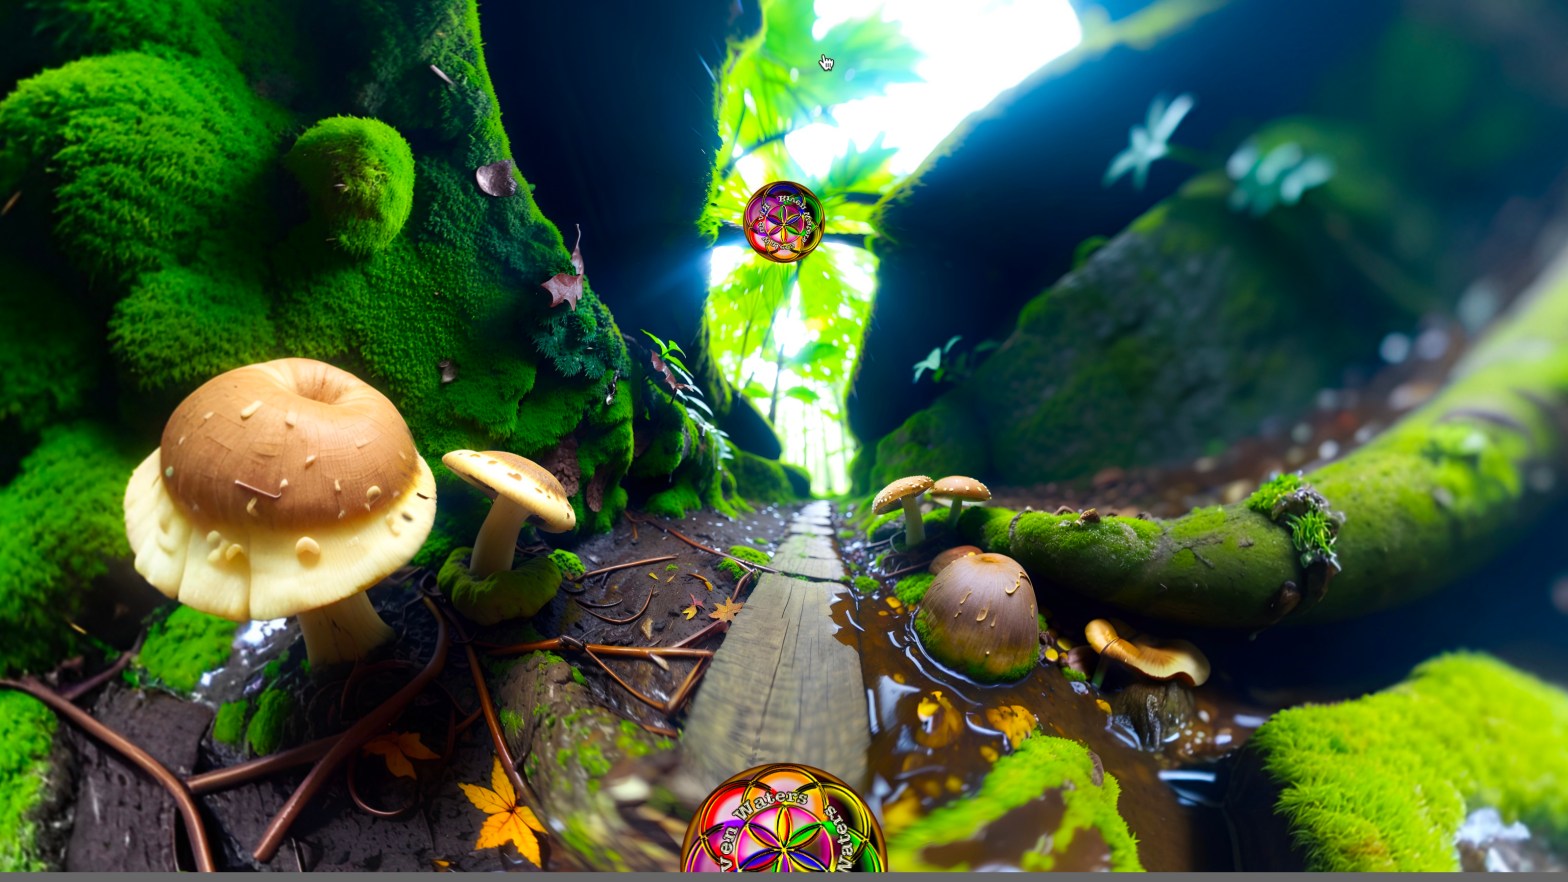

This is a simple tutorial on how to insert your branding or logos into your 360 VR environments. I’ve designed this tutorial based on generating a Pano from Skybox AI from Blockade Lab, but this will work for any Pano that you can open in Photoshop.
I will place my logo at the top or bottom, or both, especially where there is the most distortion. This is pretty much what I see other people doing as well.
What we will end up with is a template that can be inserted and used over and over. So, this may be the only time you have to do this.
Here are the steps:
1. Open Photoshop and either start with a new document in the size of the Pano that you are creating or open a Pano that you want to insert your logo into. If you start with a new document, you will need to designate the areas that are considered the Top, Bottom, Front, and Back. Alternatively, find an Equirectangular template online and insert that into your document. It helps to have a frame of reference; otherwise, you’ll only see white and not know where the top and bottom are.

2. Next, insert or place your logo into a new layer. You can use a linked file if you want. It shouldn’t matter as long as it’s on its own layer.
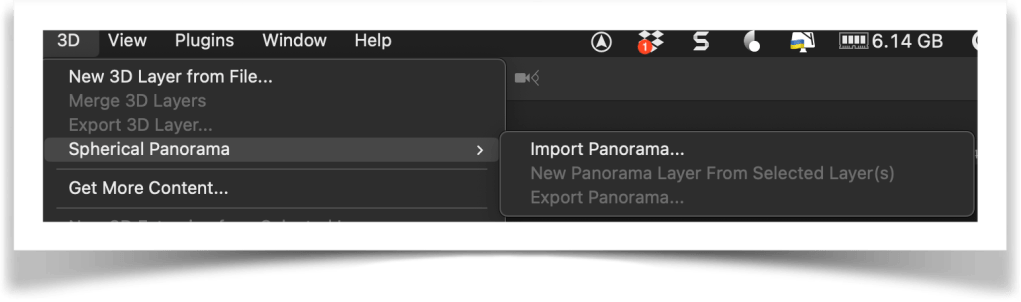
3. Select the Background layer and go to the menu. Select Spherical Panorama, then New Panorama Layer From Selected Layer(s).
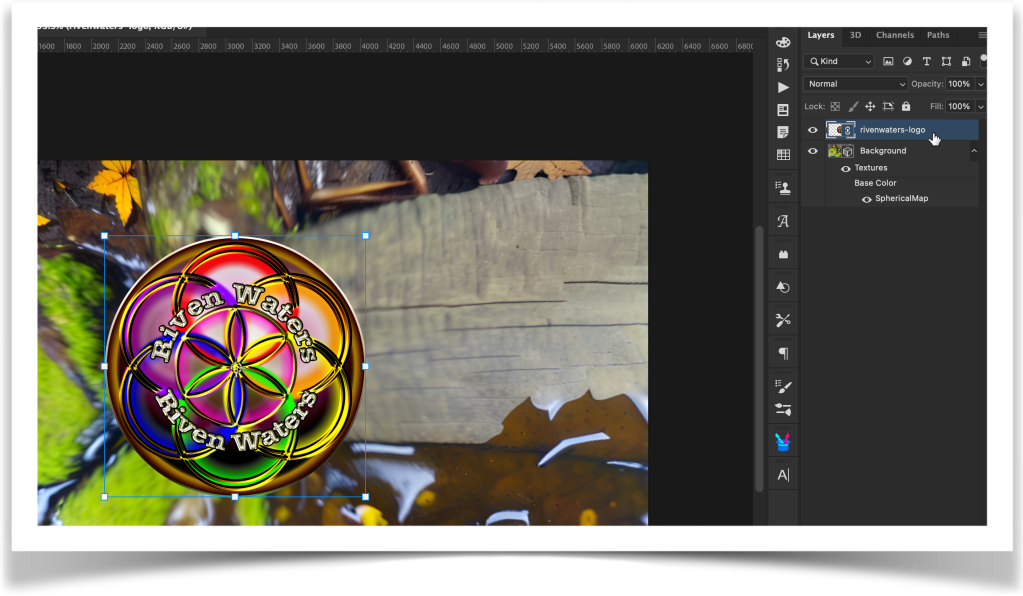
4. Your layers should now have a new 3D layer, and you will be able to maneuver around in the Pano now. Your logo will most likely be in the middle of your screen, and it still should be on its own layer. Navigate to the bottom of the Pano so your logo is in the correct position. Make any changes to the size at this time and any other changes because once we “Bake” it into the Pano, there will be no changing it after the fact.
5. Once satisfied with the placement, select the Logo layer and right-click. Select Merge Down, and the Logo should be placed inside the Sphere, and the layer for the Logo will disappear.
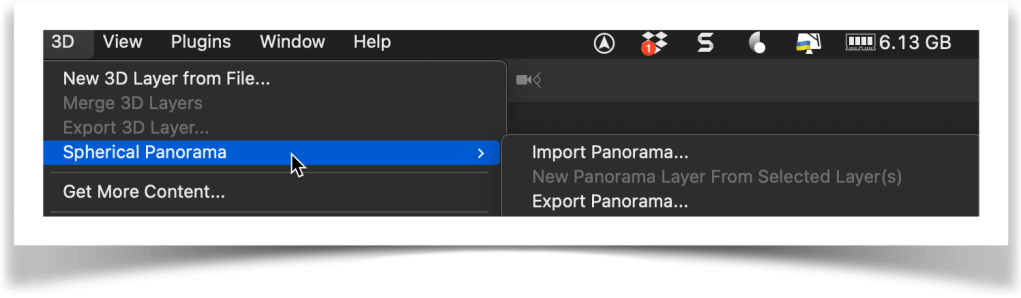
6. Now, go up to the menu again and select the 3D menu, then Spherical Panorama, and then Export Panorama. Select a location and name, and hit enter.
7. You can open it up now in your 3D viewer to check it, but let’s just open the new pano in Photoshop so we can make a template.
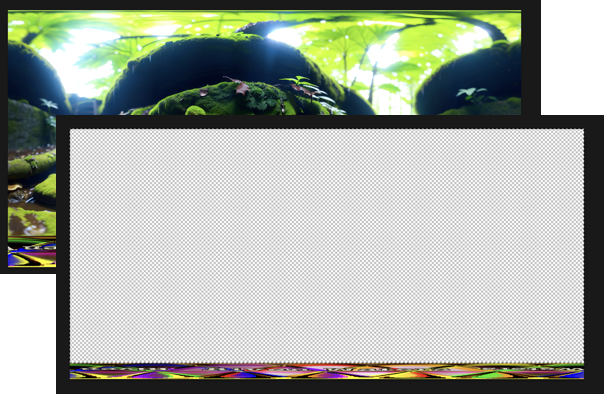
8. Once open, you will see your stretched out logo at the top or bottom or both. Simply click on the rectangular selection tool and select the main image or white space not occupied by your logo and erase it so you see the checkerboard transparent background.
9. Save your new template as a PNG file to maintain the transparency, and you have your template. Enjoy!
